How to Add MX Records for Google Workspace Email Setup
To add MX records for Google Workspace, follow these essential steps to ensure proper email functionality:
Before Starting
- Ensure your Google Workspace subscription is active
- Be prepared to wait up to 72 hours for changes to take effect
- Remove any existing MX records before adding new ones
For Squarespace-managed domains:
- Check Existing MX Records:
- Navigate to Domains panel
- Select your Squarespace domain
- Click DNS settings
- Look for Google Workspace records

Google Workspace Control Panel
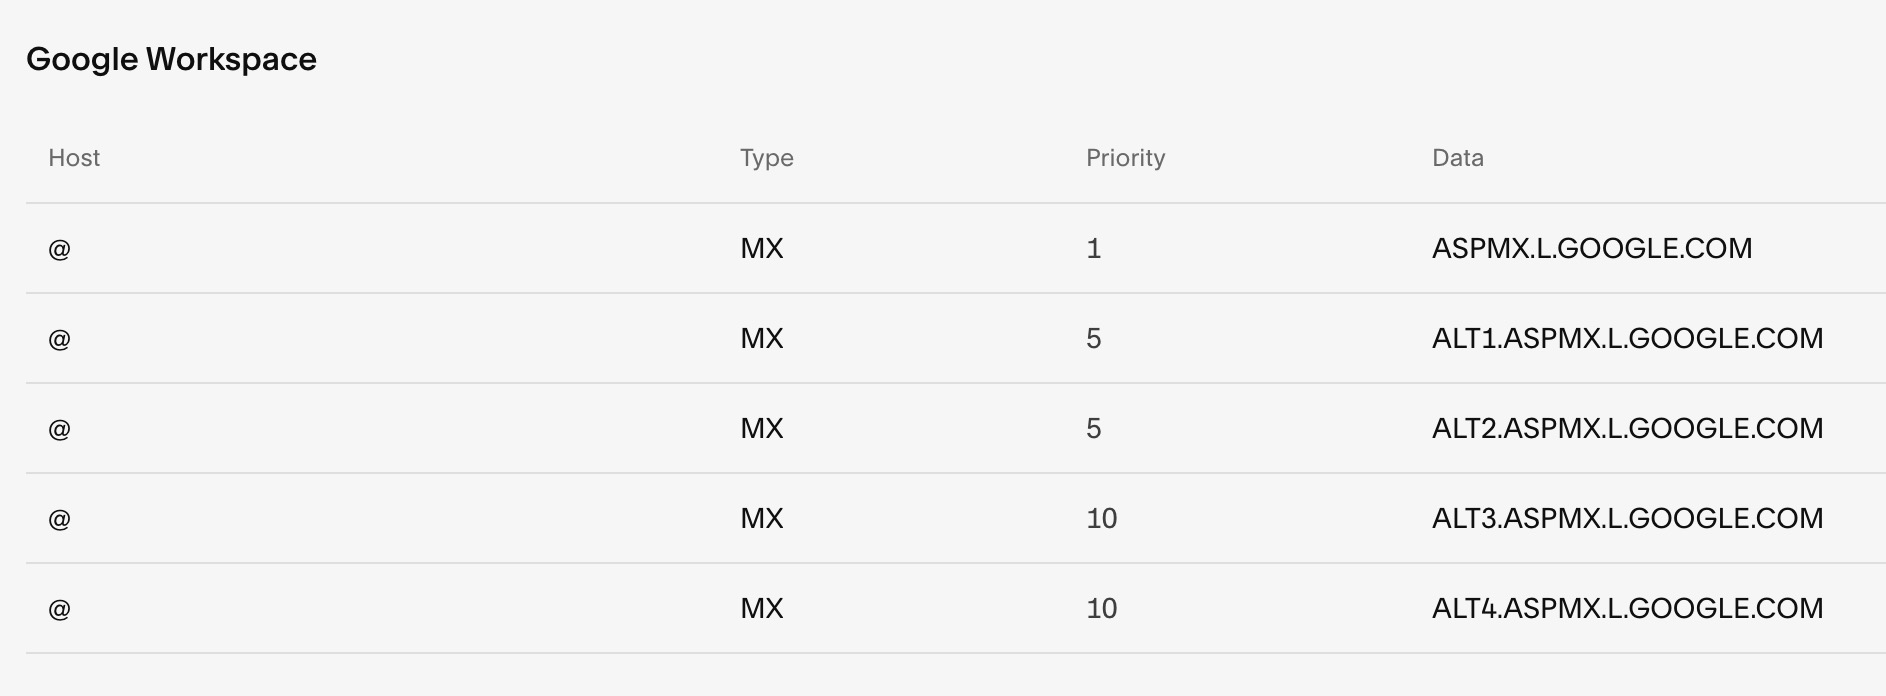
You should see either five separate records or one combined record:

Google DNS Records Table
- Add Missing Records:
- In DNS settings, select "Google Workspace MX" from Add preset dropdown
- Records will be added automatically
For Third-party Domains:
- Follow provider-specific instructions from Google documentation
- Add MX records through your domain provider's DNS settings
For Subdomains:
- Go to DNS settings
- Click "Add record"
- Enter subdomain in Host field
- Select MX as Type
- Set Priority to 10
- Enter smtp.google.com in Data field
Important Notes:
- Wait 72 hours for full propagation
- Verify records are correctly configured
- Contact support if emails aren't working after 72 hours
- Delete all existing MX records before adding new ones if experiencing issues
Troubleshooting:
- Check domain connection status
- Verify Google Workspace subscription
- Review spam settings
- Ensure proper domain verification
Related Articles

How to Add Custom Nameservers to DNS Records

