How to Add Google Workspace MX Records to Your Domain
Connecting Google Workspace MX Records to Your Domain
MX records are essential for sending and receiving emails through Google Workspace (formerly G Suite). Here's how to set them up correctly.
Prerequisites:
- A domain connected to Google Workspace
- Administrative access to your DNS settings
- Up to 72 hours for changes to take effect
Checking Existing MX Records
- Access your domain control panel
- Navigate to DNS settings
- Look for Google Workspace DNS records
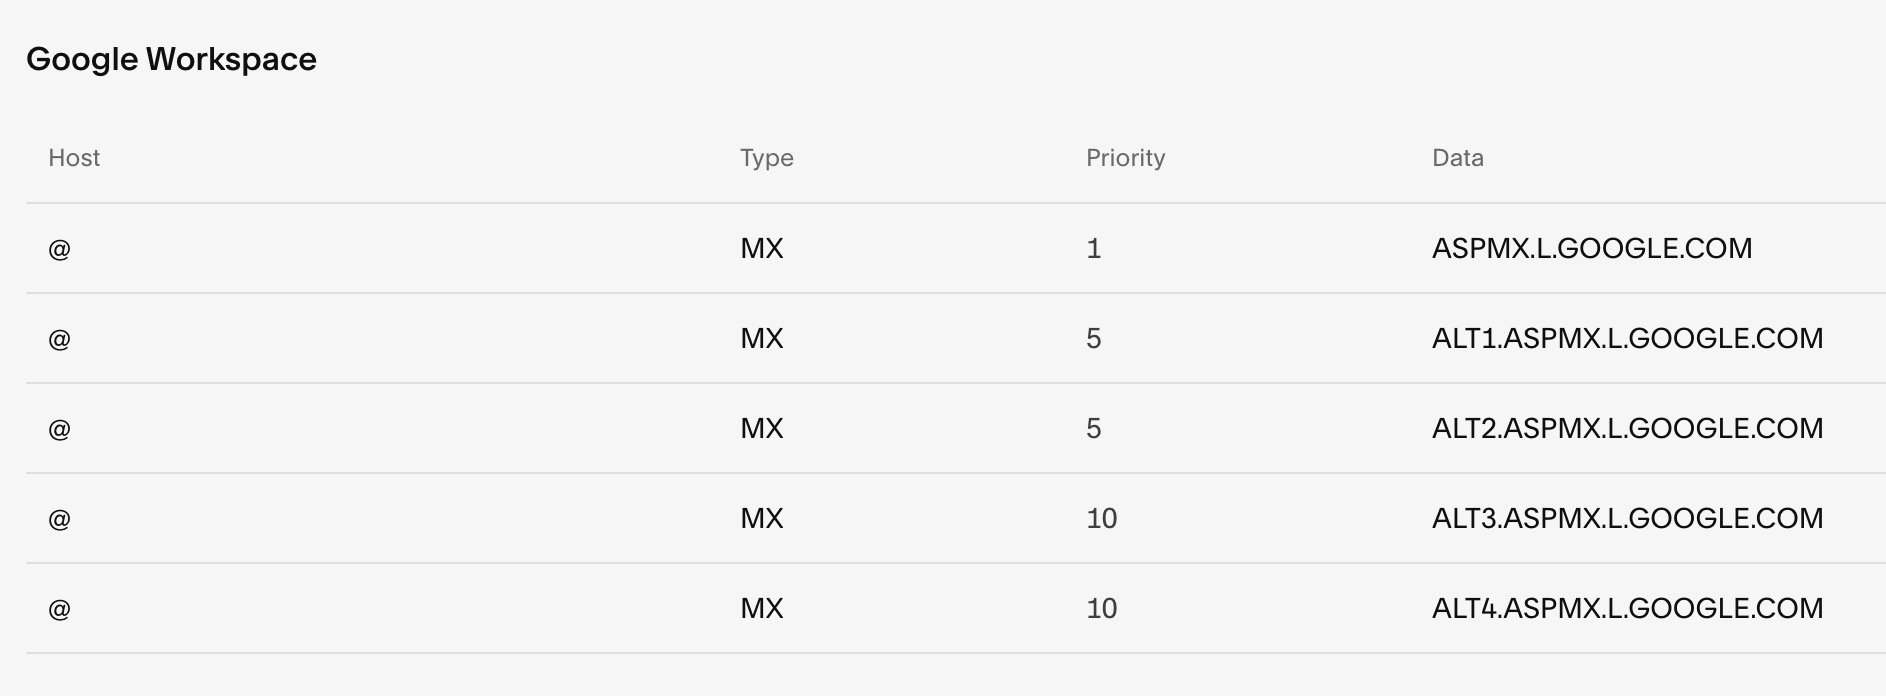
You should have either:
- Five separate MX records
- One consolidated MX record

Priority and data table
Or a single record:

Table showing Google records
Adding MX Records
For Squarespace Domains:
- Open domain control panel
- Select DNS settings
- Use "Add Preset" dropdown
- Choose "Google Workspace MX"
For Third-Party Domains:
- Access DNS settings
- Add MX records manually
- Follow Google's documentation for specific providers
For Subdomains:
- Add single MX record
- Host: Enter subdomain
- Type: MX
- Priority: 10
- Data: smtp.google.com
Troubleshooting Tips:
- If email stops working after changes, remove all MX records and re-add them
- Allow up to 72 hours for propagation
- Contact support if issues persist after 72 hours
- For non-Squarespace domains/accounts, contact Google or your domain provider
Note: DNS changes typically take 24-72 hours to fully propagate across the internet. During this time, email service may be intermittent.
Related Articles

Domain Propagation: Why DNS Changes Take Up to 48 Hours to Complete

