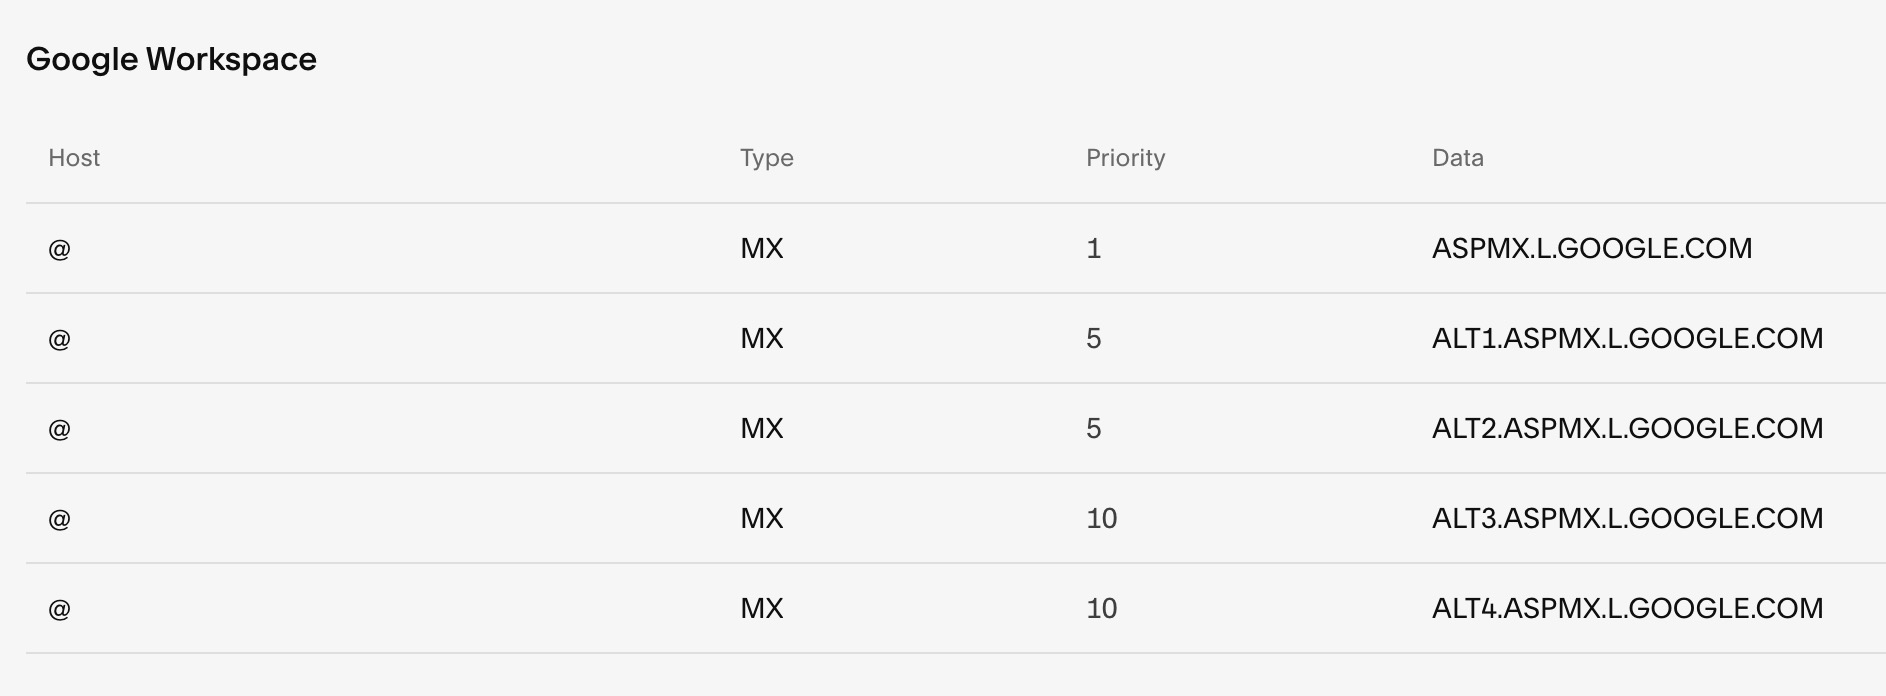
Add Google Workspace MX Records to Your Domain
Follow these steps to add Google Workspace MX records to your domain for proper email functionality:
Check Existing MX Records
- Access your domain control panel
- Select your Squarespace domain
- Click DNS settings
- Look for Google Workspace DNS records
You should see either:
- Five separate MX records
- One consolidated MX record

List of data in vertical numbering

Radio buttons in form
Adding MX Records
For Squarespace-managed domains:
- Open DNS Settings
- Select "Google Workspace" from Add presets dropdown
- Save changes
For third-party domains:
- Access your domain provider's DNS settings
- Add Google Workspace MX records according to provider instructions
- Follow Google's documentation for specific steps
For Subdomains:
- Go to DNS settings
- Click "Add record" under Custom Records
- Enter subdomain in Host field
- Select MX as Type
- Set Priority to 10
- Enter smtp.google.com in Data field
Important Notes:
- Allow up to 72 hours for MX record changes to take effect
- If email stops working after adding records, delete all MX records and re-add them
- For accounts not purchased through Squarespace, consult Google or your domain provider
- Verify records are properly configured before proceeding
If email issues persist after 72 hours, contact support for assistance.
Related Articles

Domain Propagation: Why DNS Changes Take Up to 48 Hours to Complete

