Adding MX Records: A Guide to Configure Google Workspace Email
Google Workspace requires specific MX records for proper email functionality. Here's how to add and verify them:
Check Existing MX Records
For Squarespace-managed domains, verify your MX records:
- Navigate to the domains dashboard
- Select your domain
- Click DNS
- Look for Google Workspace records
Google Workspace example clickable icon
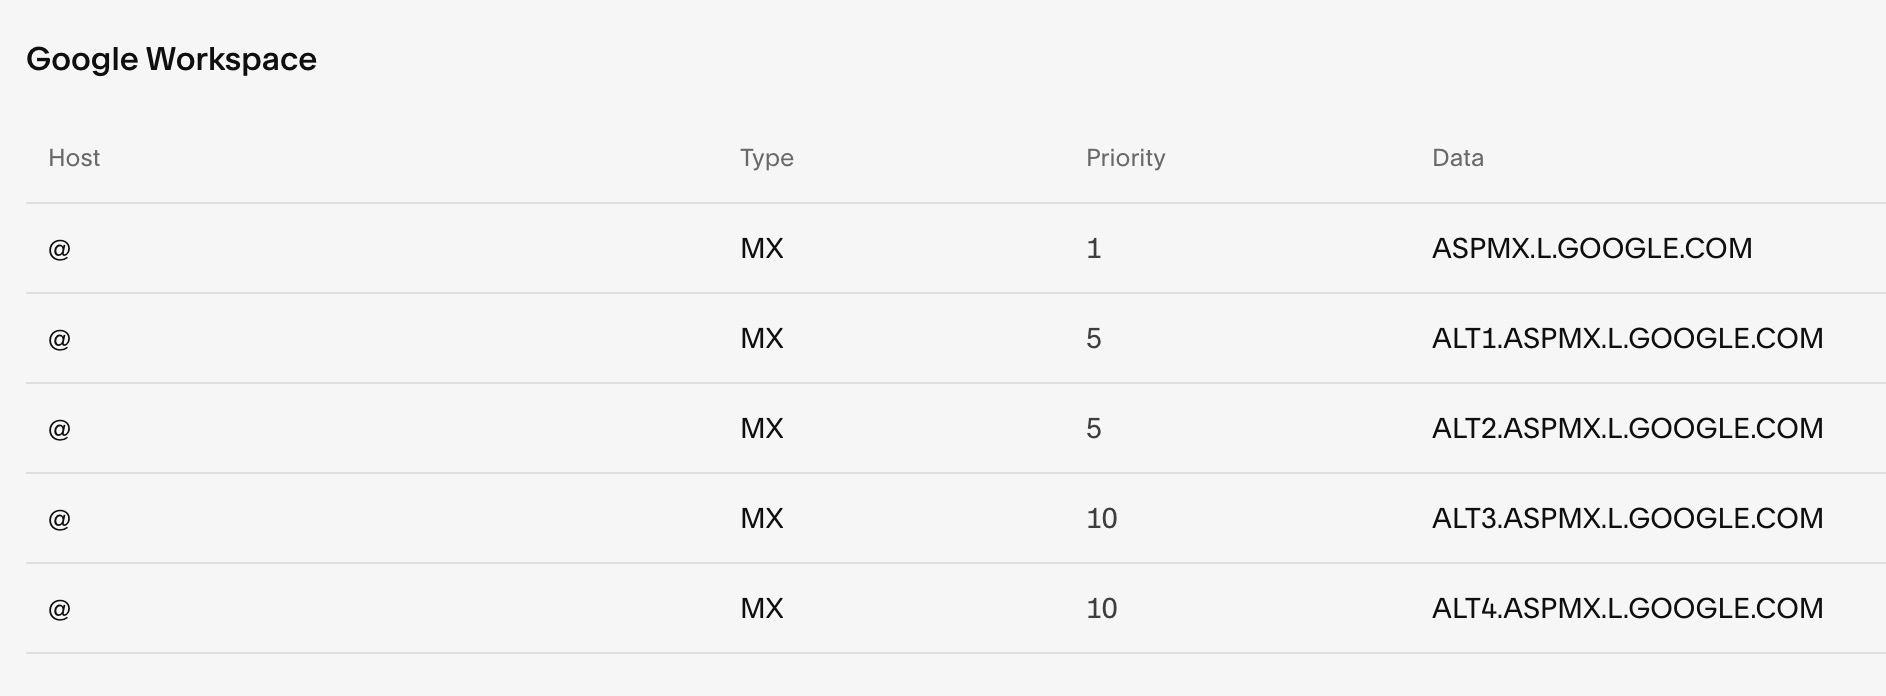
You should see either five separate MX records or a single consolidated record:

Gray interface Squarespace email settings
Adding MX Records
For Squarespace Domains:
- Access DNS Settings
- Select "Google Workspace MX" from Predefined Values
- Save changes
For Third-Party Domains:
- Access your domain provider's DNS settings
- Follow Google's documentation for your specific provider
- Add the required MX records
For Subdomains:
- Go to DNS settings
- Click "Add Record"
- Enter subdomain in Host field
- Select MX as Type
- Set Priority to 10
- Enter smtp.google.com in Data field
Important Notes:
- Changes can take up to 72 hours to process
- Remove all existing MX records before adding new ones
- If email issues persist after 72 hours, contact support
- For accounts not purchased through Squarespace, contact Google or your domain provider
Troubleshooting Tips:
- Verify domain connection
- Check subscription status
- Monitor spam settings
- Remove conflicting DNS records
Remember to wait the full 72 hours before concluding there's an issue with your setup.
Related Articles

How to Add Custom Nameservers to DNS Records