
Squarespace CSS Editor Guide: How to Add Custom Styling to Your Site
To add custom CSS to your Squarespace site:
- Access CSS Editor
- Navigate to custom CSS panel
- Click "Open in a new window" for larger view (optional)
- Add your CSS code
- Click Save to publish changes
Note: The editor shows line numbers and highlights syntax errors in red.
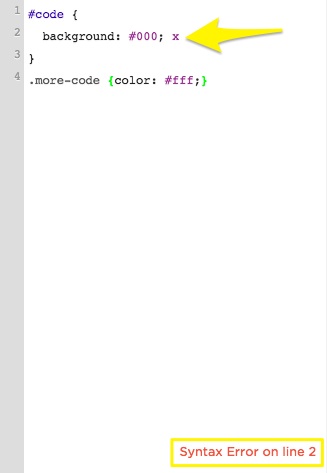
Example of code in Squarespace
- Important Limitations
- Use CSS only for fonts, colors, and backgrounds
- Custom CSS doesn't transfer between templates in v7.0
- Code must pass cross-browser compatibility checks
- Upload Custom Files
- Click "Custom Files" or "Manage Custom Files"
- Add images or fonts by clicking upload button or drag-and-drop
- Supported formats: .jpg, .png, .gif, .ttf, .otf, .woff (no .svg)
- Using Custom Files in CSS
- Place cursor where you want file URL in code
- Click the uploaded file
- URL automatically inserts at cursor position
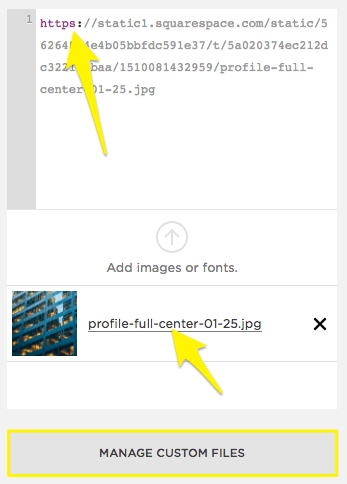
Profile picture on web article
- SSL Considerations When enabling SSL:
- Open CSS Editor
- Click "Manage Custom Files"
- Click the file
- Update URL to use https://
- Save changes
Best Practices:
- Double-check code formatting
- Verify syntax before saving
- Test changes across different browsers
- Keep backup of original CSS
Need Help?
- Consult Squarespace Forums
- Consider hiring a Squarespace Expert
- Review documentation for detailed guidance
Related Articles

How to Connect a Squarespace Domain to Your Website