

Setting Up DNS Connect: How to Link Your Hover Domain with Squarespace
DNS Connect helps connect your Hover domain to Squarespace while keeping it registered with Hover. Follow these steps for a successful connection:
Step 1: Connect in Squarespace
- Go to Domains panel
- Click "I already have a domain"
- Enter your domain name
- Click "Connect Domain"
- Select Hover from dropdown
- Click "Continue"
- Keep the DNS records panel open for reference
Step 2: Access Hover Account
- Log in to your Hover account
- Locate your domain under "Your Domains"
- Click the Squarespace logo in the Connect section
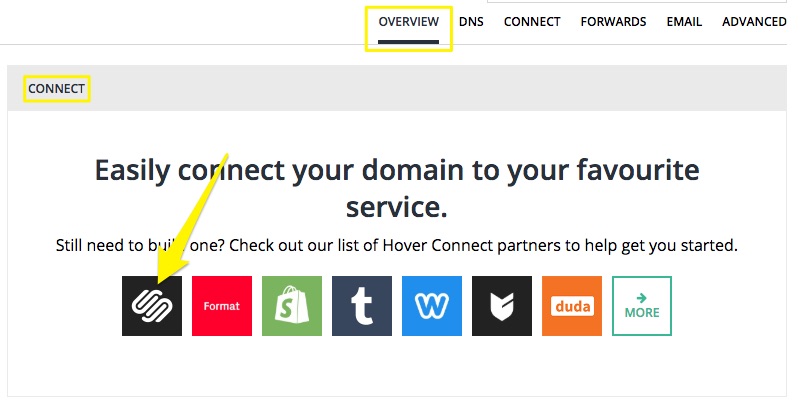
Squarespace DNS Logo
Step 3: Verify Domain
- Copy the unique verification code from Squarespace's DNS Settings (first line of Host column)
- Paste the code into Hover's Verify Value field
- Click "Connect" to automatically add required records

Squarespace Domain Connection Instructions
Step 4: Wait for Connection
- Allow 24-72 hours for the domain to connect
- Monitor progress in Squarespace DNS settings
- Click "Refresh Records" to check status
- Look for green labels indicating successful connection
- Domain will show "Connected" label when complete
Troubleshooting
- If errors persist after 72 hours, check Squarespace's troubleshooting guide
- For Hover-specific issues, contact Hover support
- Reference DNS records documentation for detailed connection requirements
Remember: Domain propagation can take up to 72 hours. During this time, you may experience temporary connection issues or error messages.
Related Articles
How to Set Up a Third-Party Subdomain on Squarespace: Step-by-Step Guide
