Report Issues with Sent Email Campaigns
Send blast campaigns to your mailing lists instantly or schedule them for later delivery. Here's how to send successful email campaigns:
Before Sending:
- Create at least one mailing list
- Set up sender information
- Prepare your email draft
- Verify your email and domain (if using custom email)
- Add a physical address to your website
- Review spam filter guidelines
Important Notes:
- Campaigns won't send if you exceed monthly limits
- Your device's timezone determines scheduled campaign timing
- New subscribers may need to confirm their subscription
- Campaigns cannot be resent to specific subscribers
Adding Email Information:
- Access Drafts in Email Marketing dashboard
- Edit your draft
- Add Subject and Preview Text
- Select recipients from mailing lists
- Set sender information
- Add official postal address
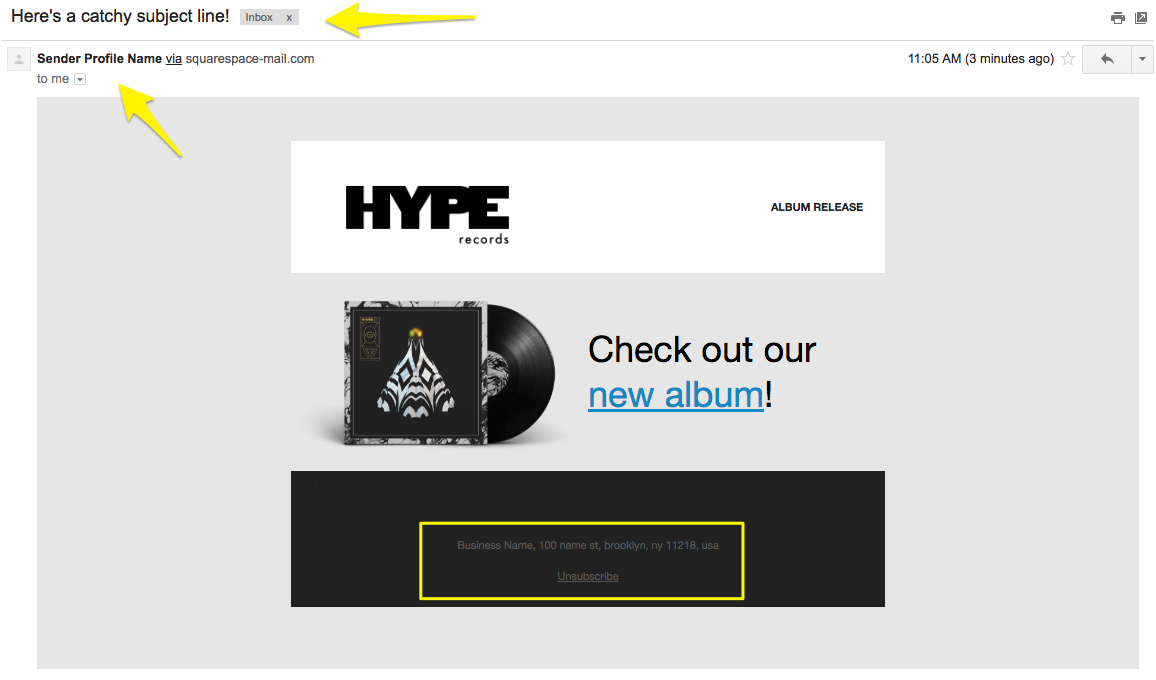
Black and white album cover
Testing Your Campaign:
- Send a test email to yourself
- Check all links and buttons
- Review for typos
- Verify image display
- Confirm unsubscribe link presence
- Test on multiple devices
Sending Options:
Immediate Send:
- Click Schedule
- Enable Instant Send
- Click Send to Recipients
Scheduled Send:
- Click Schedule
- Disable Instant Send
- Select date and time
- Click Schedule Campaign
Campaign Review Process:
- All campaigns undergo automatic security review
- Review typically takes minutes, occasionally hours
- Campaigns show "Review Pending" status during review
- Approved campaigns send automatically
Email Display Notes:
- Unverified domains show "via squarespace-mail.com"
- Custom email with verified domain removes these labels
Tracking Results:
- Monitor opens, clicks, and delivery rates
- View detailed analytics in Email Marketing dashboard
- Compare performance with previous campaigns
Important Reminders:
- Sent campaigns cannot be recalled
- Contact support for sending issues
- Avoid resending to prevent duplicates
Related Articles
How to Set Up a Third-Party Subdomain on Squarespace: Step-by-Step Guide