How to Set Up and Verify Email Sender Profiles for Email Campaigns
A sender profile determines how your email campaigns appear to subscribers, consisting of your "From:" name and email address. Here's how to set it up properly:
Before Starting:
- Use a custom domain email address (like [email protected]) instead of free services
- Ensure all information is accurate to comply with laws like the CAN-SPAM Act
- You can create up to 10 sender profiles but use only one at a time
Creating Your Sender Profile:
- Navigate to Email Campaigns settings > Sender Profiles > Add Sender
- Enter your sender name (visible to recipients)
- Add your email address (preferably custom domain)

GROW.WELL.COACHING in white
Email Verification:
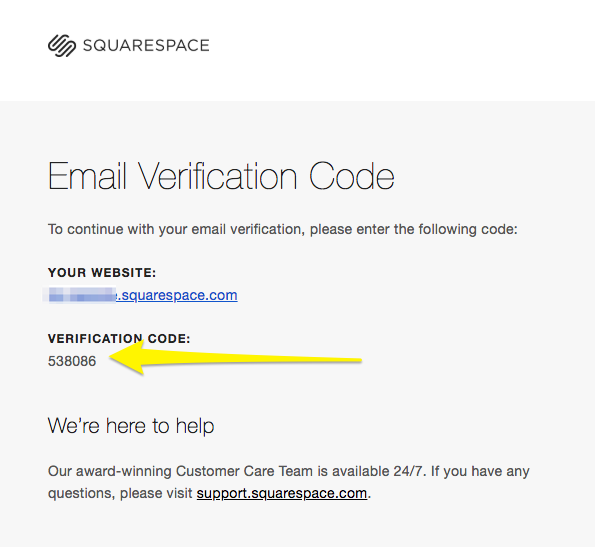
- Check your inbox for the verification email
- Copy and enter the verification code

Squarespace access code via email
Domain Verification:
- Squarespace domains: Automatically verified
- Third-party domains: Require manual verification
- DMARC policy set to p=reject: Must verify domain before use
Best Practices:
- Register domain through Squarespace for automatic verification
- Set up custom email with Google Workspace
- Avoid free email services (Gmail, Yahoo, AOL) to prevent delivery issues
- Include accurate postal address in campaigns
Managing Your Sender Profile:
- Edit: Settings > Sender Profiles > ... > Edit (can only modify name)
- Delete: Settings > Sender Profiles > ... > Delete
- Create new profile if email address needs changing
Free email services may result in modified "From:" addresses (using sqspmail.com) or rejection. For optimal delivery, always use a custom domain email address.
Related Articles

Website Launch: Essential Checklist & Guide

