Domain Verification Guide: How to Authenticate Third-Party Domains for Email Campaigns
Email authentication helps prevent your campaigns from being marked as spam. For custom email addresses matching your domain (e.g., [email protected]), domain verification is essential for email deliverability.
If your domain is registered through Squarespace, it's automatically verified. For third-party domains, you can either:
- Transfer the domain to Squarespace for automatic verification
- Manually add verification records to your domain's DNS settings
Adding Verification Records Manually
- Access Your DNS Settings:
- For nameserver-connected domains: Edit through DNS Settings panel
- For DNS-connected domains: Edit through your domain provider
- Locate Verification Records:
- Open Email Campaign settings
- Under Sender Details, click Authenticate
- Note the two required DNS records
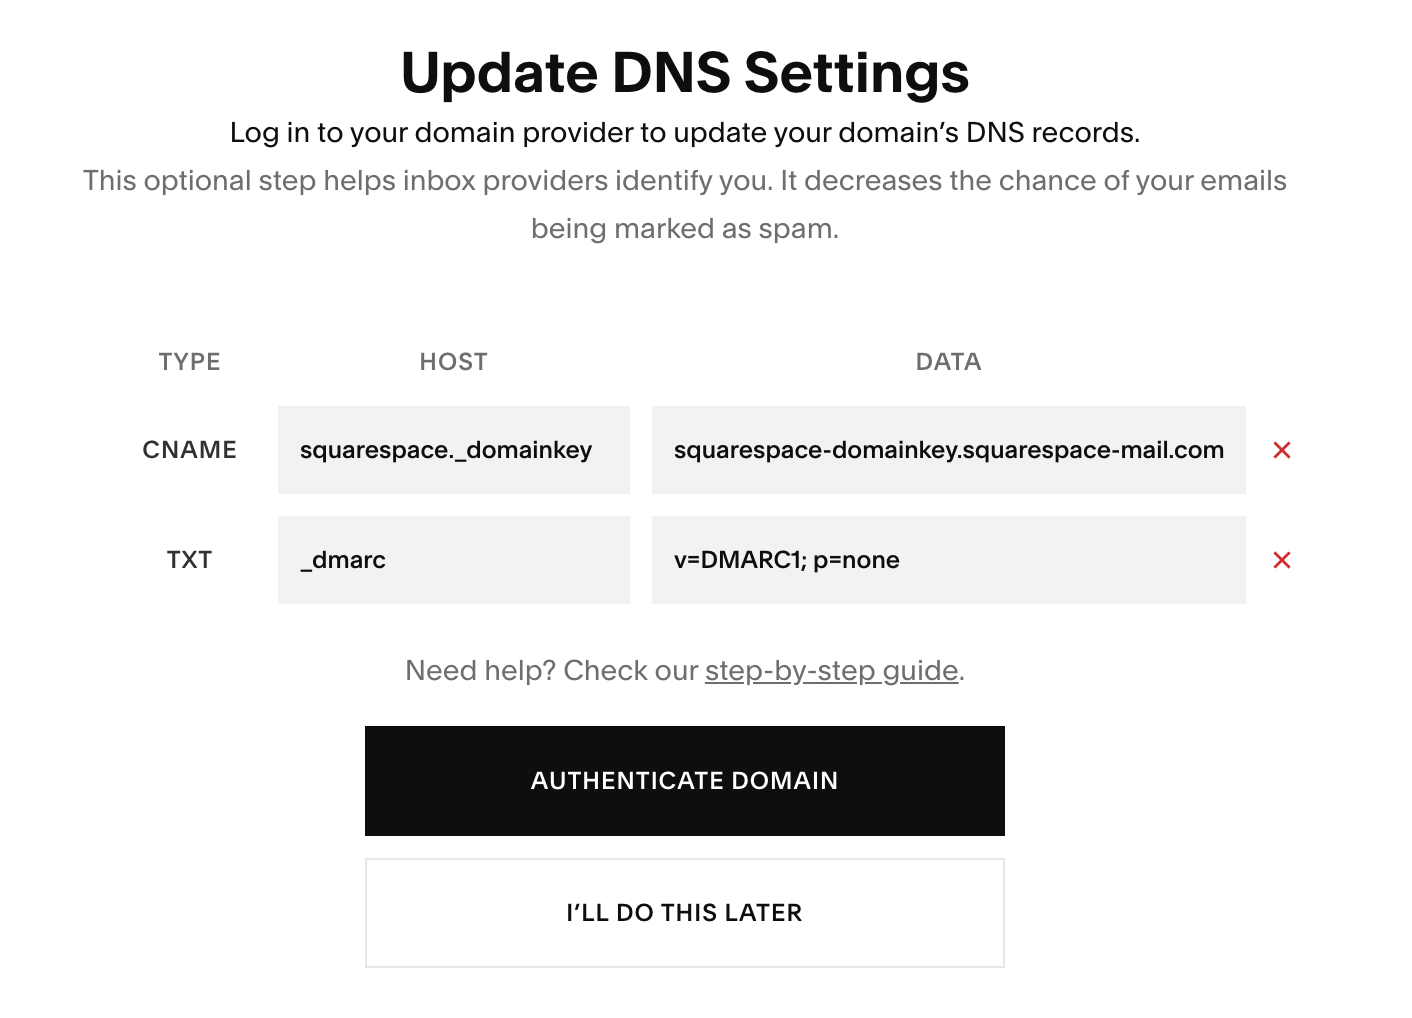
Screenshot of DNS settings list
- Add Required Records:
First Record:
- Type: CNAME
- Host: squarespace._domainkey
- Data: squarespace-domainkey.squarespace-mail.com
Second Record:
- Type: TXT
- Host: _dmarc
- Data: [unique code provided in authentication window]
Provider-Specific Instructions
IONOS:
- Login to my.ionos.com/domains
- Select domain
- Click DNS
- Click Add Record
- Add CNAME and TXT records
GoDaddy:
- Access dashboard.godaddy.com
- Navigate to Domain Settings
- Click Manage DNS
- Add both records under DNS Records
Google Domains:
- Login to domains.google
- Click DNS icon
- Scroll to Custom resource records
- Add both records
Hover:
- Login to hover.com
- Click DNS
- Click Add Record
- Add both records
Namecheap:
- Login to namecheap.com
- Navigate to Domain List > Manage
- Click Advanced DNS
- Add both records
Note: DNS changes may take up to 72 hours to fully resolve. Verification is complete when "Domain is unauthenticated" no longer appears under your sender details.
Related Articles
How to Set Up a Third-Party Subdomain on Squarespace: Step-by-Step Guide